Cloth diapering. We're doing it.
We're only five days in to our cloth diapering adventure, and I am loving it. In those five days, we have saved approximately $20.00 in disposable diaper fees. It is so economical and easy that I am kicking myself for not trying it sooner.
After asking for suggestions back in January, Nathan and I received a ton of valuable information. Going off of various recommendations, I then did some extensive research and read a number of consumer reports on different products. I promised my sister I would give a play by play analysis of what we do, so that's what I'm going to do today! I want her (and you) to see just how doable cloth diapering is. Without further ado, this is the method we decided upon.
To begin, we chose
Flip cloth diapers. This sums up their features:
These are similar to the amazing BumGenius diapers, but they are much cheaper. They fit babies and toddlers from 8lbs to 35 lbs.
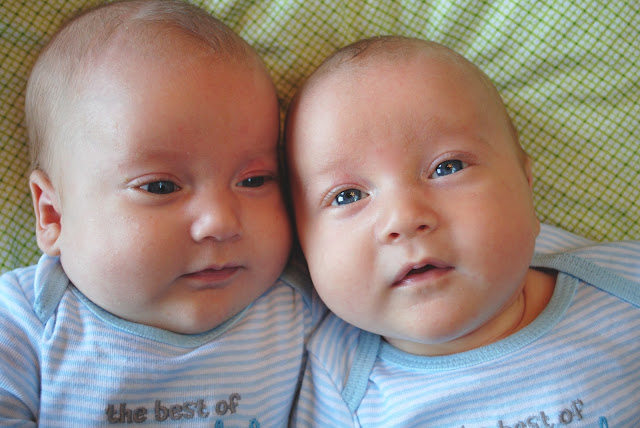
This means we can use the same system of diapers for the twins and Eliza, which is very convenient. The system has two halves: the diaper cover and the insert.
I stumbled upon a buy one, get one free deal for the covers and stocked up. Eliza ended up with several shades of Zinnia covers (she loves her pink diapers) and the boys have Noodle and Moonbeam colored covers. They have tons of cute colors to choose from, but these were the shades that were on sale at the time.
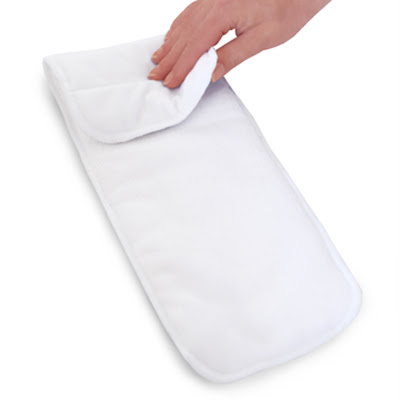
I then opted to use the
stay-dry insert. We simply remove the insert and place a clean one in the cover each time we change the kids. There is no folding other than tucking in the insert into the front of the cover.
I simply take out one insert and place another one. Easy.
After changing a few cloth diapers, Nathan remarked: "This is just as quick as changing a disposable!" It's the truth, too. It takes no time at all to get the babies in and out of the cloth diapers.
In addition to the stay-dry inserts, we also purchased several
organic inserts. I read the difference between the two systems and here is the bottom line. The stay-dry inserts act more like disposable diapers in that they wick any wetness away from the baby's bottom. The organic inserts are much more absorbent, but do not pull away from the child. Because of this, many parents use the organic inserts to pad the stay-dry inserts over night. This add dual protection, and is highly recommended by parents who have children that are heavy wetters.
Now for the fun part: cleaning up the "mess."
Fortunately for us, Eliza is potty-trained to do her real business in the potty. If you have an older child who is not partially potty trained, there are
great inserts that can be added to the cloth diaper. They catch any mess and are flushable. With our current situation, once we have a wet diaper, we rinse it off and spray it with an anti-bacterial spray called
Bac-Out. Spray the insert only--not the cover. We reuse the covers several times or until they are "dirty."
This prevents the build up of ammonia and bacteria in the diapers. Bac-Out is wonderful because it also removes odors and is a stain remover. My friend
Brittany, a seasoned cloth diapering mother, recommended the rinse off method. It is simple and effective, and if you have a problem with touching dirty diapers, you can invest in a diaper sprayer.
Once the babies are older, I am sure we are going to love our
diaper sprayer. It easily attaches to the toilet and allows you to clean off the diapers without really touching the messiness. One simply holds the dirty diaper over the toilet and sprays it off. Nathan and I are luckily dealing with breastfed babies, who have only a couple of dirty diapers a week. Cleaning diapers off (for now) is not a big deal. Additionally, I read that breast milk diaper stools dissolve in water and don't really need to be sprayed off the diaper. I clean all my diapers, though.
And really, that is the hard part. It sounds super gross and disgusting, but it is EASY. Just think, though: every time you change a diaper, you save 20 cents. It really adds up!
Now what do we do with the dirty diapers? Well, we have an antibacterial pail liner for the messy diapers, which goes into a
simple trashcan with a lid. I did a bunch of reading on liners and found the
Kissa Antibacterial Liner had rave reviews. Because we use the Bac-Out, we have had no problems with odors. I have read recommendations to tape an
Arm and Hammer air freshener to the top of the lid, so we will do that just as a preventative measure.We wash the diapers daily in our house because we do laundry so often.
So now to washing these diapers. I simply take the liner and empty it into the washing machine. I then turn it inside out and place it in the washer with the diapers. I never actually touch the diapers, which is great. I then chose this method for washing
: Run a cold wash cycle first. Then, warm wash on regular cycle. Extra rinse. That's it. Easy! There is no need to soak the diapers beforehand. It is important to wash the diapers with cold water first because it prevents stains setting in. Washing the diapers in hot water first bakes the stains into the material.
Top loading washing machines clean cloth diapers the best. Nathan and I have front loading, high efficiency washers, so we have to be careful with the settings. If the cycle is too hot, the fibers of the diaper can be destroyed. I never choose "hot" on our washer because it is way too much. Instead, we use warm water. Warm water is best in high efficiency washers because it helps rinse any detergent residue off the diaper and doesn't destroy the cloth material. "Hot" in most top loading washers is the equivalent of "warm" in high efficiency washers (typically).
I've read mixed reviews regarding detergent. Some people do fine with regular detergent (you use 1/4 the recommended amount), while others deal with the dreaded hard water build-up. This can ruin your diapers, but is fixable (wash your diapers in Dawn or Ivory dish soap). In an effort to avoid any hard water damage (our water is incredibly hard here in the desert), I opted to use a special cloth diaper detergent. It costs me about 15 dollars and will hopefully last half a year. I use 2 tbs of Rockin Green detergent, and my diapers smell AMAZING. They are brilliantly white after several very messy diapers.
Speaking of messy diapers again, did I mention that blow-outs are a thing of the past? We used to have a problem with Elliott and Ezra ruining their outfits and needing baths any time they went to the bathroom. The cloth diapers catch everything! I am so excited that I am willing to rinse off dirty diapers and wash them. It is worth it.
So far, the boys and Eliza have done great. Unlike last time we tried cloth diapering, there are no signs of diaper rash. If there seems to be any sign of a rash, we have some
California Baby Calming Diaper Rash Cream on hand. Coconut oil is also a great, natural remedy for rashes that is safe for cloth diapers. Just remember that Desitin and other regular creams cannot be used with cloth.
Nathan and I are thrilled with the results and love saving money. It also feels good to not have a pail full of disposable diapers to throw in the trash at the end of the day.
You should think about it :)
A big thanks to all the ladies who gave suggestions and my friends who have shown me that cloth diapering can be done!
And in case you were wondering, I bought enough diapers to last through two days of not washing. This is approximately 36 inserts and 8 covers. Because I found a sale and received 10 dollars off my first order (along with free shipping), my diaper system cost just under $200. The additional supplies were approximately $80. In two months, everything will be "paid off," meaning we will break even with what we would have spent on disposables.


